# Example: Purchasing and Managing Subscriptions using Connect Sessions
This is a walkthrough of our [example application for purchasing and managing subscriptions](https://github.com/gigs/connect-sessions-buy-manage-example/tree/main) in an existing application using Connect Sessions.
While this example is written in Next.js and uses TypeScript, the concepts discussed here should be transferrable to every other programming language and framework. We did our best to leave out any Next.js specifics in this guide to keep it as simple as possible.
To enhance readability and highlight the key concepts, we have simplified the code throughout this guide. As a result, **you should not copy and paste code snippets directly from this guide** with the expectation that they will work as is.
Additionally, to prevent redundancy, this guide refers back to previous sections where certain concepts have already been introduced. If you're skimming through and encounter unclear points, reviewing the guide in its entirety may provide clarity.
However, if you've read the complete guide and some things still are unclear, please do not hesitate to contact us at [support@gigs.com](mailto:support@gigs.com) so we can improve this guide further!
Further resources:
- [Connect Sessions API Documentation][create-connect-session]
- [Full source code of the example application](https://github.com/gigs/connect-sessions-buy-manage-example/tree/main)
## Allowing users to purchase subscriptions
Our example application is a small shop that sells mobile phones. Naturally, in order to use their phones, users need a phone plan. We'll be adding the ability to purchase a phone plan within our existing checkout success page.
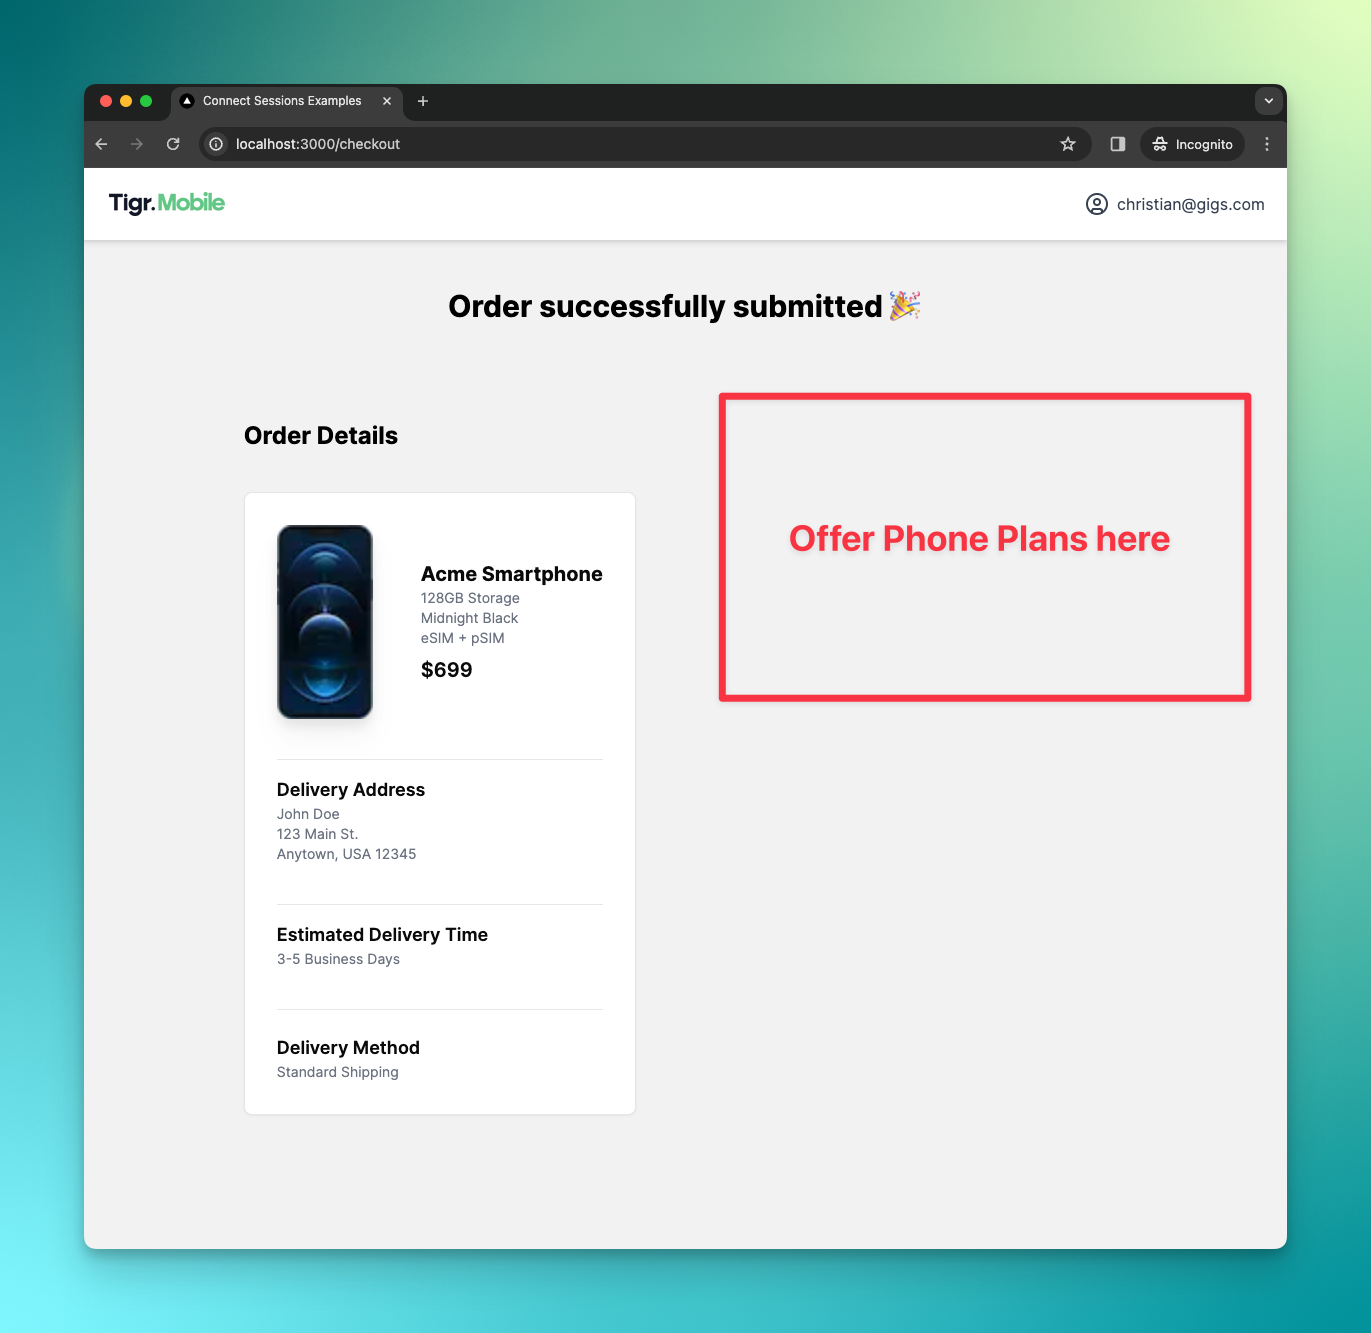
### Building the UI
As a first step, we'll fetch the existing plans from our project. This will return an array of `Plan` objects:
```tsx
export const getPlans = async (): Promise<{ error?: string; data: Plan[] }> => {
const response = await fetch(
`https://api.gigs.com/projects/${process.env.GIGS_PROJECT}/plans`,
{
headers,
},
)
const data = await response.json()
if (response.status !== 200) {
return {
error: data.message,
}
}
return { data: data.items }
}
```
_Note: In the headers, we pass our API Token as a `Bearer` token in the `Authorization` header. Please refer to the [full implementation](https://github.com/gigs/connect-sessions-buy-manage-example/blob/main/lib/api.ts) or the [guide on the topic](/api/authentication) for more information._
In our page, we call this function to obtain all plans we can offer the user:
```tsx
const CheckoutPage = async () => {
const { error, data: plans } = await getPlans()
return (
// ...
)
}
export default CheckoutPage
```
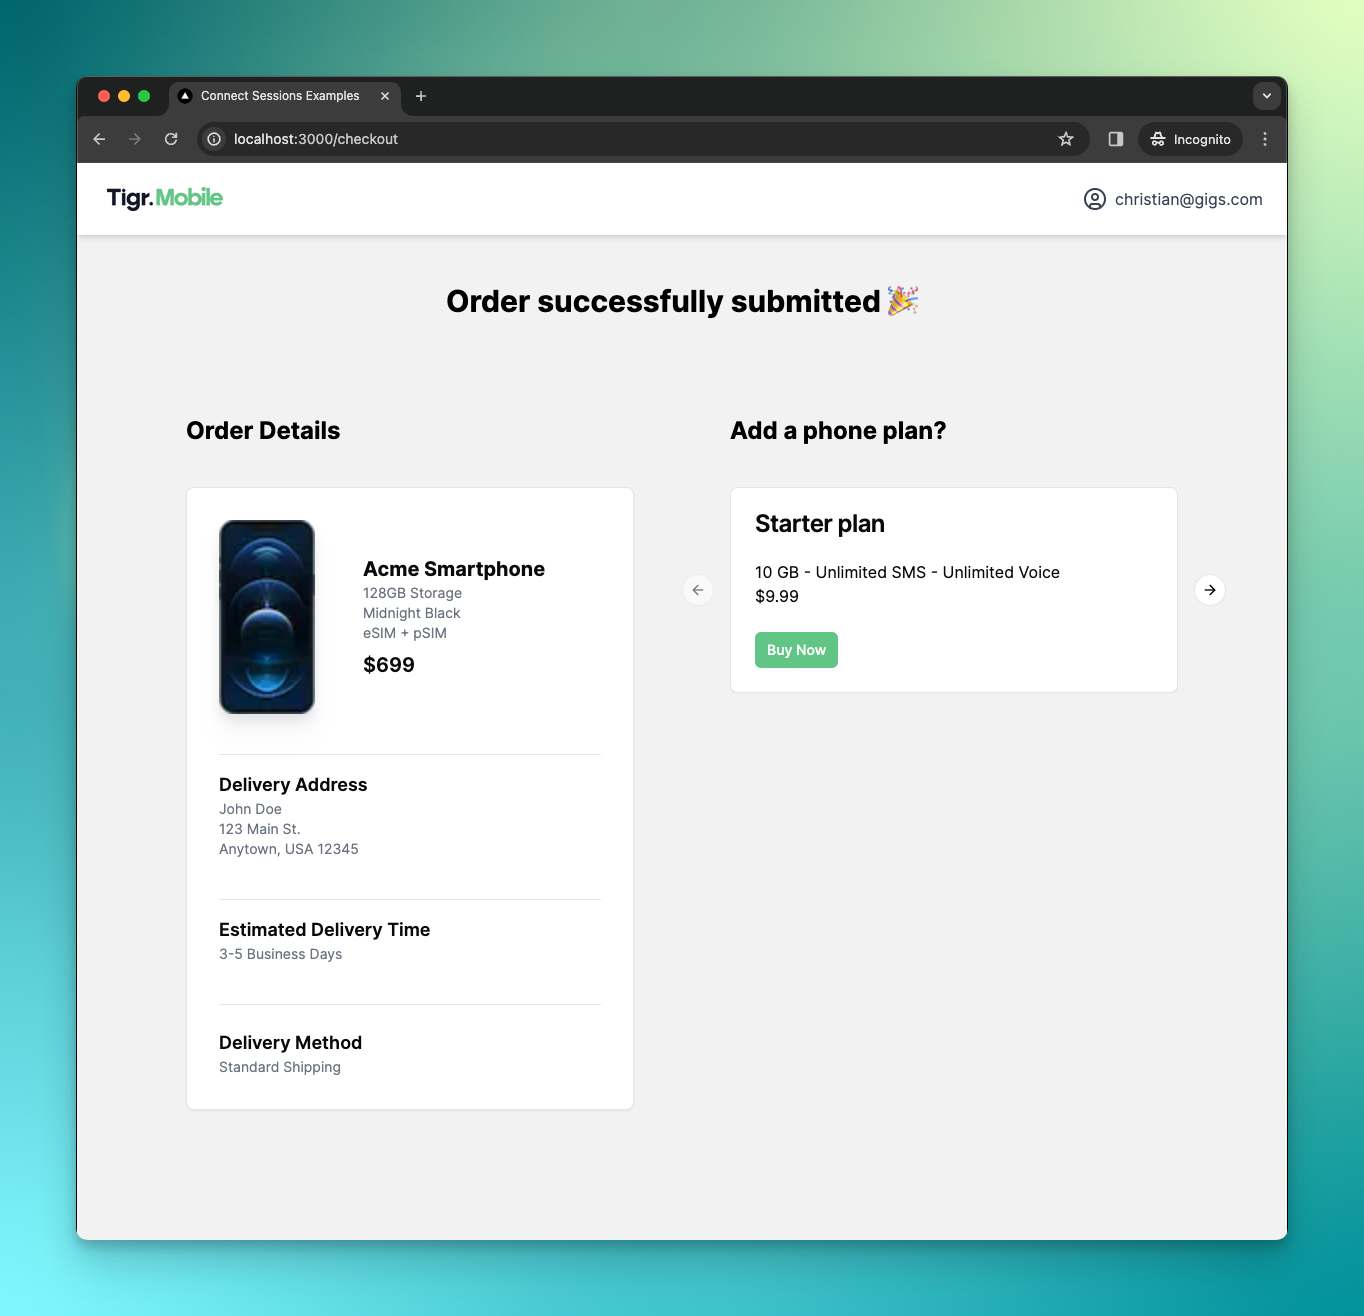
We then map over the plans to render a `PurchasePlanCard` for every plan in a carousel:
```tsx
{plans.map((plan) => (
))}
```
The `PurchasePlanCard` displays some information such as the price and the data limits of the plan. It also has a button to purchase the plan:
```tsx
export const PurchasePlanCard = ({
title,
allowances,
price,
planId,
}: PurchasePlanCardProps) => {
const handleClick = async (planId: string) => {
// To be done
}
return (
{title}
{description(allowances)}
{formatPrice(price)}
)
}
```
This is all the UI we'll need for now. Moving forward, we will develop the logic required to enable users to purchase a specific plan.
### Creating the Connect Session
Once the user clicks the "Buy" button on one of the plan cards, we want to create a new Connect Session with the `checkoutNewSubscription` intent for the given subscription. Additionally, we want to forward the user data we've collected from the user who has just completed a checkout to Connect.
#### Preparing user data
We're going to take care of the user data first. Since our user is already logged in, we'll call the `auth()` function to retrieve the user details we can pass on to the Connect Session:
```tsx
const currentUser = auth.getUser()
```
Please be aware that in our example, this function serves as a mock and returns hardcoded values. In a real-world scenario, a similar function would likely exist. In our case, this function returns the `email`, `fullName` and `birthday` of our user.
Knowing the email, we can now check if the user is already present in our Connect project or if we need to create them:
```tsx
const { data: userRes } = await findUser(currentUser.email)
const existingUser = userRes && userRes[0]
```
The `findUser` function calls the [/users/search](/users#search-for-users) endpoint and passes the `email` as a query parameter to get a list of matching users (see the [full implementation](https://github.com/gigs/connect-sessions-buy-manage-example/blob/main/lib/api.ts#L79-L97) here for reference). With this knowledge, we can now create the user data payload for our Connect Session. Connect Sessions accept either a `user` field with the ID of an existing user or a `userDetails` field in case the user has to be created:
```tsx
const userPayload = existingUser
? { user: existingUser.id }
: {
userDetails: {
birthday: currentUser.birthday,
email: currentUser.email,
fullName: currentUser.fullName,
preferredLocale: 'en-US',
},
}
```
#### Assembling and using the Connect Session
The remaining parts of the Connect Session body are pretty straight forward. We need to define the intent `type`, pass the selected `planId` in the `intent` payload and merge in our user data:
```tsx
const connectSession = {
callbackUrl: 'http://localhost:3000/phone-plans',
intent: {
type: 'checkoutNewSubscription',
checkoutNewSubscription: {
plan: planId,
},
},
...userPayload,
}
```
We also set the `callbackUrl` in the payload. This is the URL Connect will redirect the user to after the Connect Session has been completed.
With the request body ready, we can make a `POST` request to [`/connectSessions`][create-connect-session]:
```tsx
export const checkoutNewSubscription = async (planId: string) => {
const currentUser = auth.getUser()
const { data: userRes } = await findUser(currentUser.email)
const existingUser = userRes && userRes[0]
const userPayload = existingUser
? { user: existingUser.id }
: {
userDetails: {
birthday: currentUser.birthday,
email: currentUser.email,
fullName: currentUser.fullName,
preferredLocale: 'en-US',
},
}
const connectSession = {
callbackUrl: 'http://localhost:3000/phone-plans',
intent: {
type: 'checkoutNewSubscription',
checkoutNewSubscription: {
plan: planId,
},
},
...userPayload,
}
const options: RequestInit = {
method: 'POST',
headers,
body: JSON.stringify(connectSession),
}
const response = await fetch(
`https://api.gigs.com/projects/${process.env.GIGS_PROJECT}/connectSessions`,
options,
)
const data = await response.json()
if (response.status !== 200) {
return {
error: data.message,
}
}
return { data }
}
```
Upon success, this request will return a new Connect Session with an `url` field. We can use this URL to redirect the user to Connect where they can purchase a subscription for the chosen plan.
The last step to initialize the checkout flow, is to call the `checkoutNewSubscription` function in our page and redirect the user upon success:
```tsx
export const PurchasePlanCard = ({
title,
allowances,
price,
planId,
}: PurchasePlanCardProps) => {
const router = useRouter()
const handleClick = async (planId: string) => {
const { data: session, error } = await checkoutNewSubscription(planId)
if (error) {
// Do error handling here
}
if (session?.url) {
router.push(session.url)
}
}
return (
// ...
)
}
```
We have successfully integrated the option for users to purchase phone plans directly from our checkout success page, eliminating the necessity for users to re-enter their information in Connect. Now, with just a few clicks — such as deciding whether to port an existing phone number — users can easily complete their purchase.
We, as the developers, do not have to be concerned about the details of creating an order, handling portings and dealing with payments. With a minimal addition of new code, we've integrated a significant new feature into our application.
_Note: In the video above we see a callback redirect to the `/phone-plans` page. We'll be creating this in the next section._
## Managing existing subscriptions
Now that users can purchase plans via our application, it's also important to enable them to manage their plans within our app. Although Connect offers this capability, our users are accustomed to logging in through our portal and navigating it comfortably. Therefore, we'll leverage Connect Sessions once more, delegating only the more complex aspects of plan management to Connect.
We want our users to be able to
- **Purchase Add-ons** for their subscriptions if they run out of data
- **Change their subscription** if they frequently need more data
- **Cancel their subscription** if they are no longer happy with it
### Building the UI
We’ll start again by building the user interface and then create Connect Sessions afterwards.
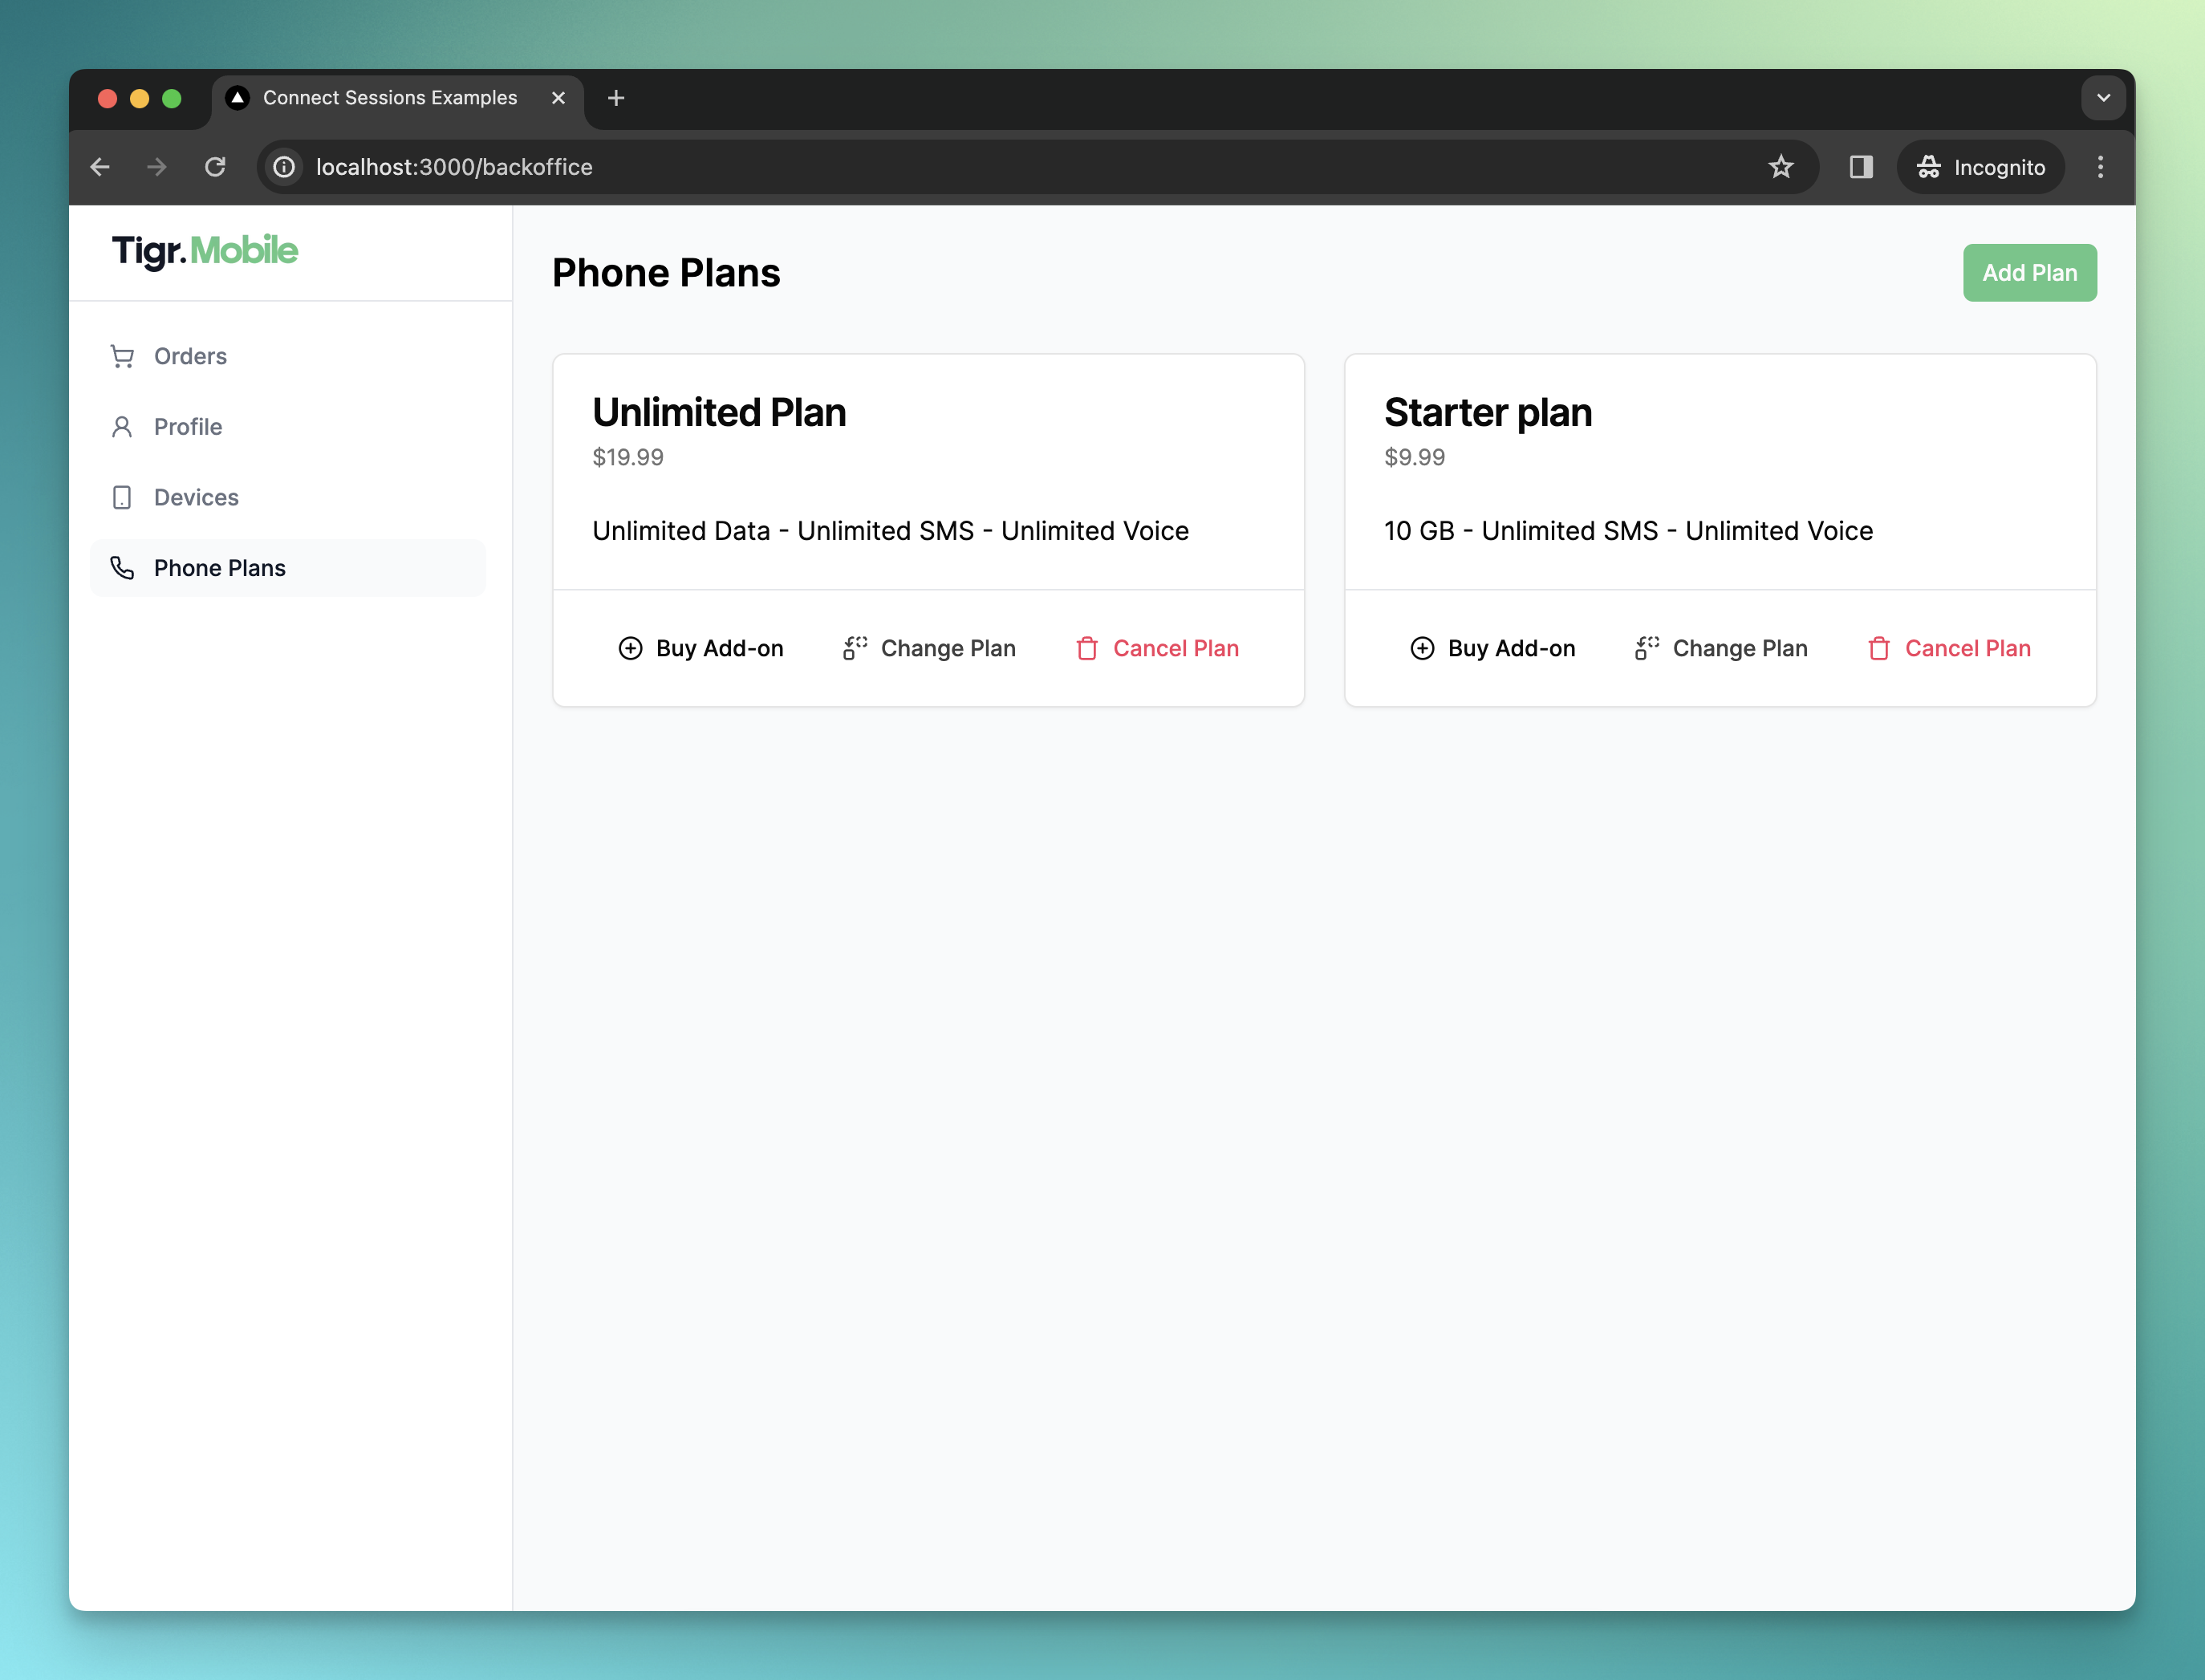
As a first step, we created a new section in our existing dashboard for managing subscriptions
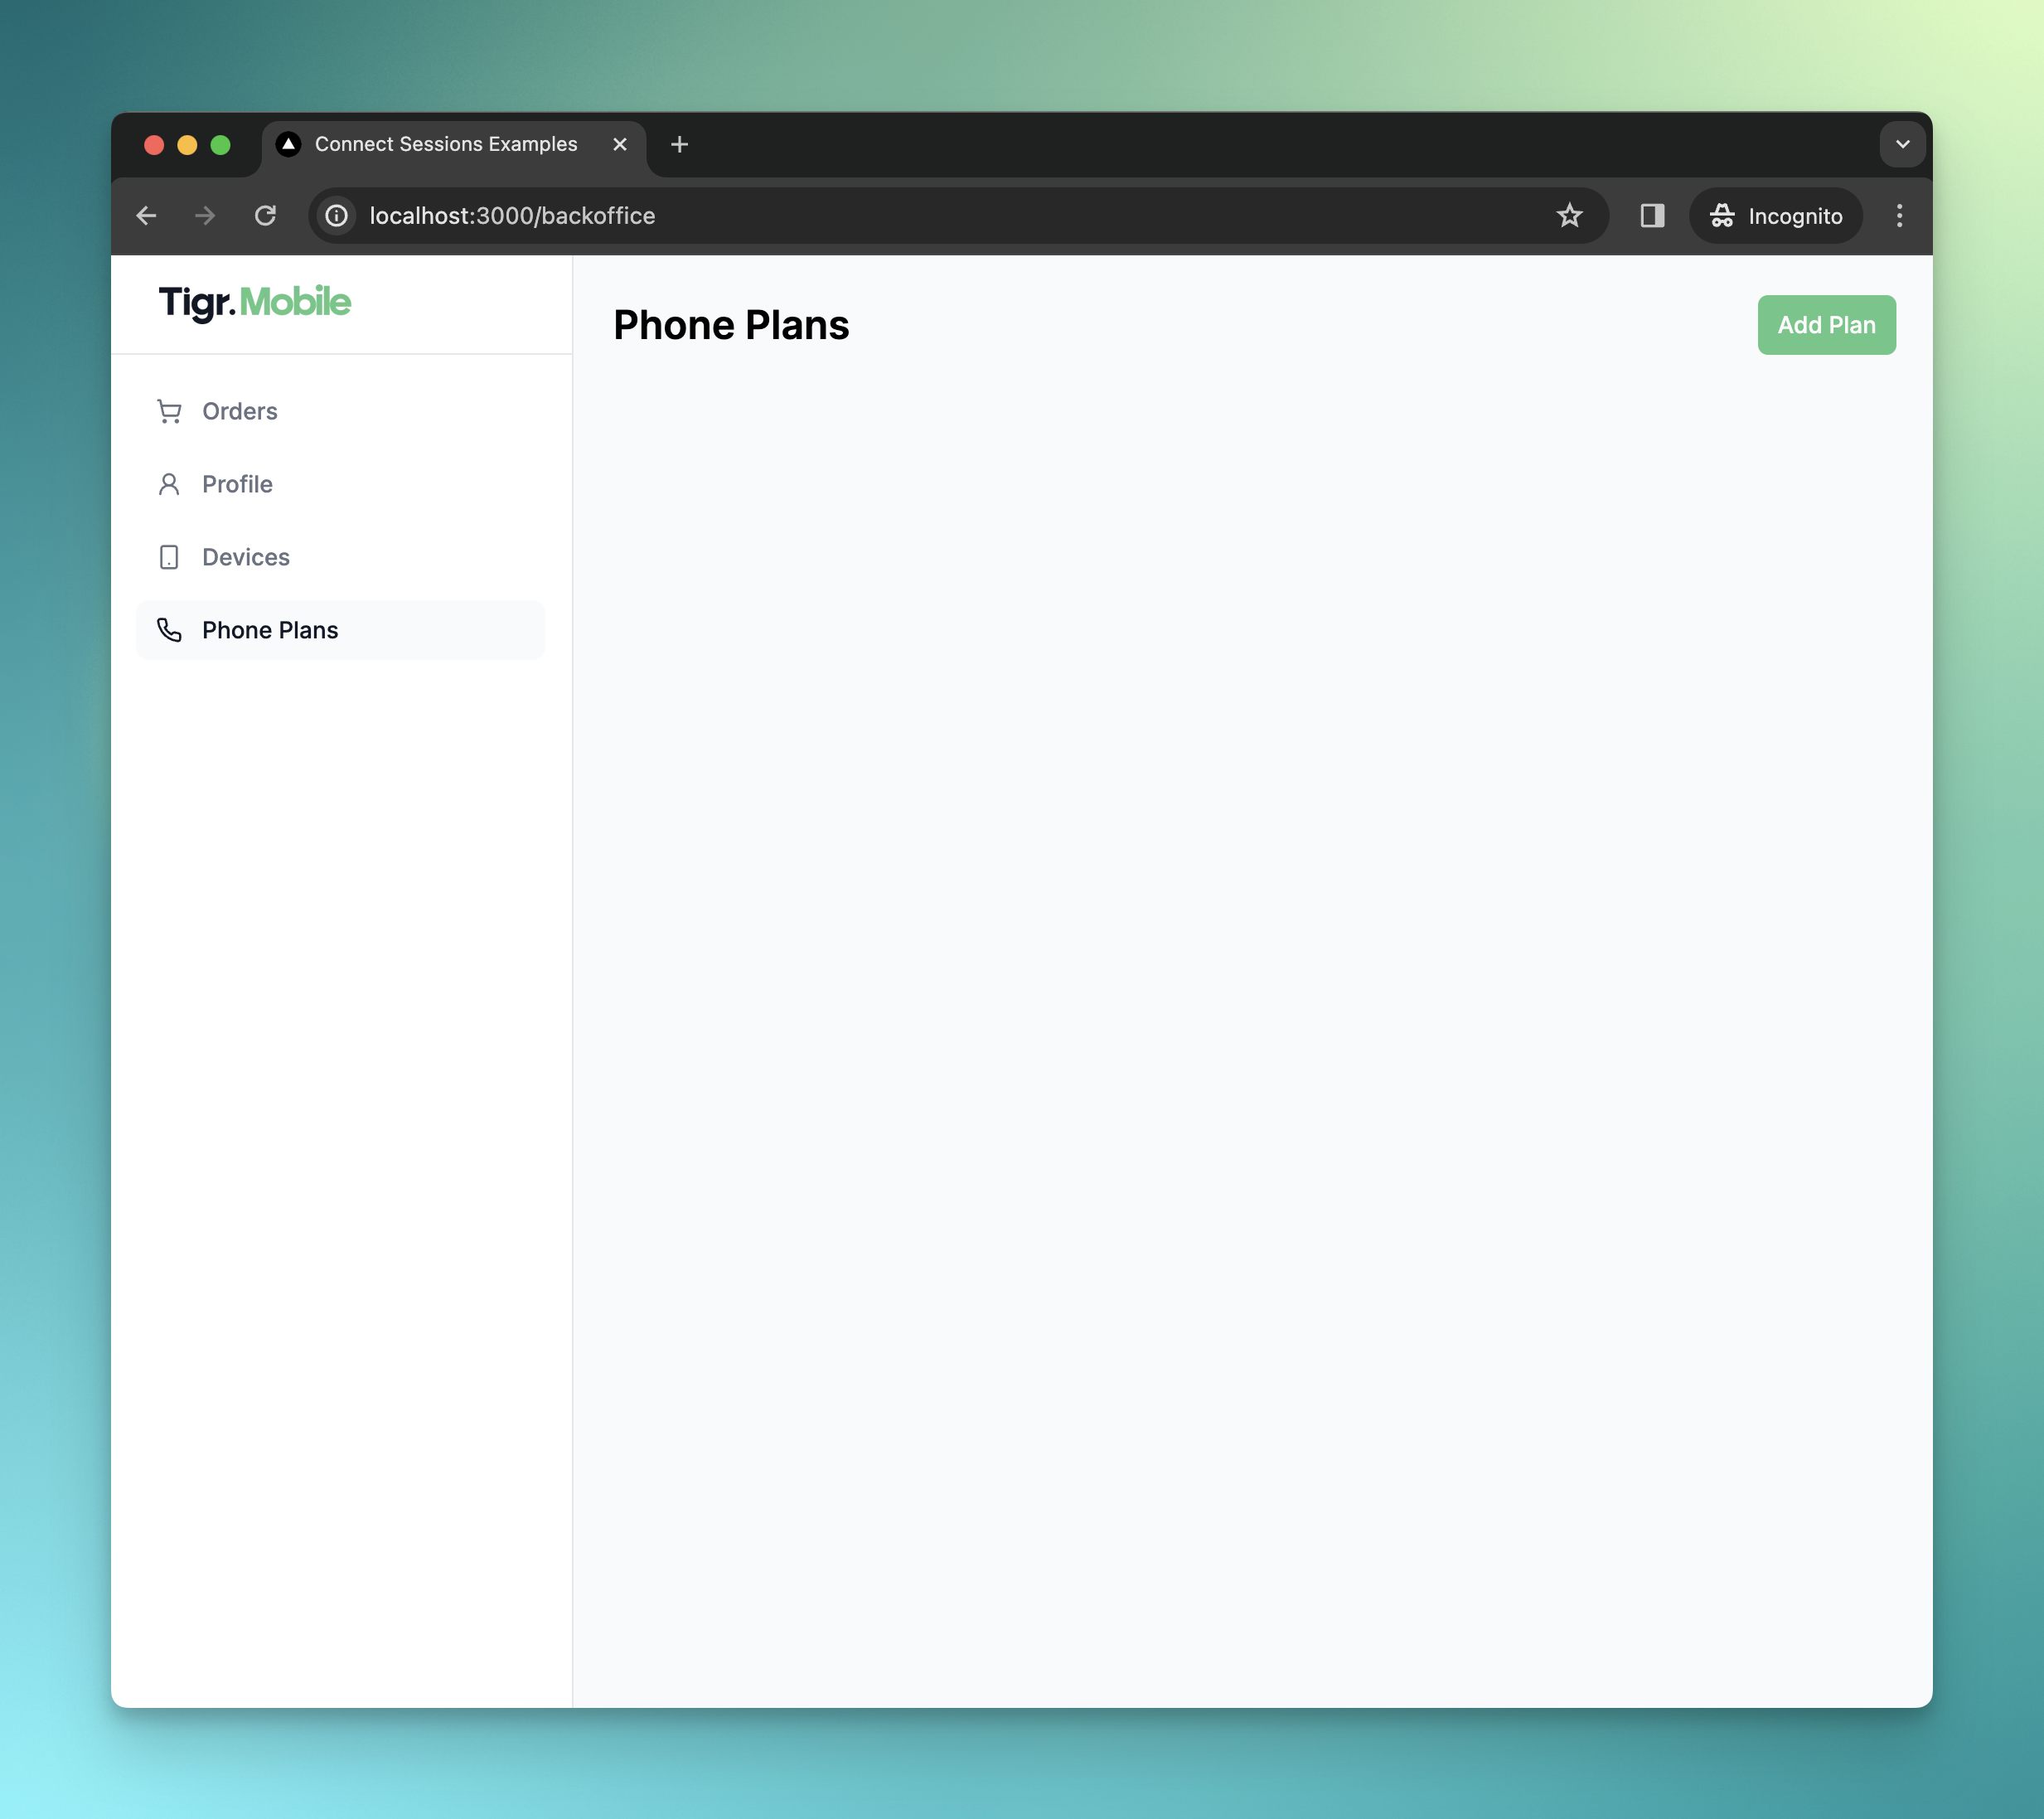
The first thing we need to do is fetch a user's subscriptions and display them here. To do this, we utilize the [`/subscriptions`](/subscriptions#list-all-subscriptions) endpoint which accepts a `user` query parameter, allowing us to filter for only our current user. In order to obtain the `userId` we once again need to find our current user in the Connect project:
```tsx
export const getSubscriptionsByUser = async () => {
const currentUser = auth.getUser()
// Wrapper around /users/search
const { error: userError, data: userData } = await findUser(
currentUser.email!,
)
if (userError || !userData || userData?.length === 0) {
return { error: 'User not found' }
}
const userId = userData[0].id
const response = await fetch(
fetchUrl(`subscriptions?user=${userId}&status=active`),
{
headers,
},
)
const data = await response.json()
if (response.status !== 200) {
return {
error: data.message,
}
}
return { data: data.items }
}
```
_Note: The `findUser` function calls the [/users/search][search-for-users] endpoint to get a list of matching users (see the [full implementation](https://github.com/gigs/connect-sessions-buy-manage-example/blob/main/lib/api.ts#L79-L97) here for reference)._
With this function in place, we are now able to display a list of the current user's subscriptions on our dashboard:
```tsx
export default async function PhonePlansPage() {
const { data: subscriptions } = await getSubscriptionsByUser()
return (
)
}
```
Each `ManagePlanCard` presents subscription details alongside a section containing buttons (``), enabling users to perform management actions on each subscription:
```tsx
export const ManagePlanCard = async ({ subscription }: ManagePlanCardProps) => {
const { data: addons } = await getAddons(subscription.plan.provider)
return (
{subscription.plan.name}
{formatPrice(subscription.plan.price)}
{description(subscription.plan.allowances)}
)
}
```
The `ManagePlanActions` component consist of three buttons: Two for changing/cancelling the subscription and one for opening a menu that lists add-ons available for purchase.
For that reason, we’re also fetching the available add-ons for a subscription in the `` using the [`/subscriptionAddons`][list-all-subscription-add-ons] endpoint. This endpoint accepts a `subscription` query parameter so we can filter the available add-ons by subscription. (The logic is very similar to finding users, so we’re not looking at the `getAddons` function in detail here, please refer to the [full implementation](https://github.com/gigs/connect-sessions-buy-manage-example/blob/main/lib/api.ts#L99-L118) for more details).
We pass the add-ons on to the `` component:
```tsx
export const ManagePlanActions = ({ subscriptionId, addons }) => {
return (
<>
)
}
```
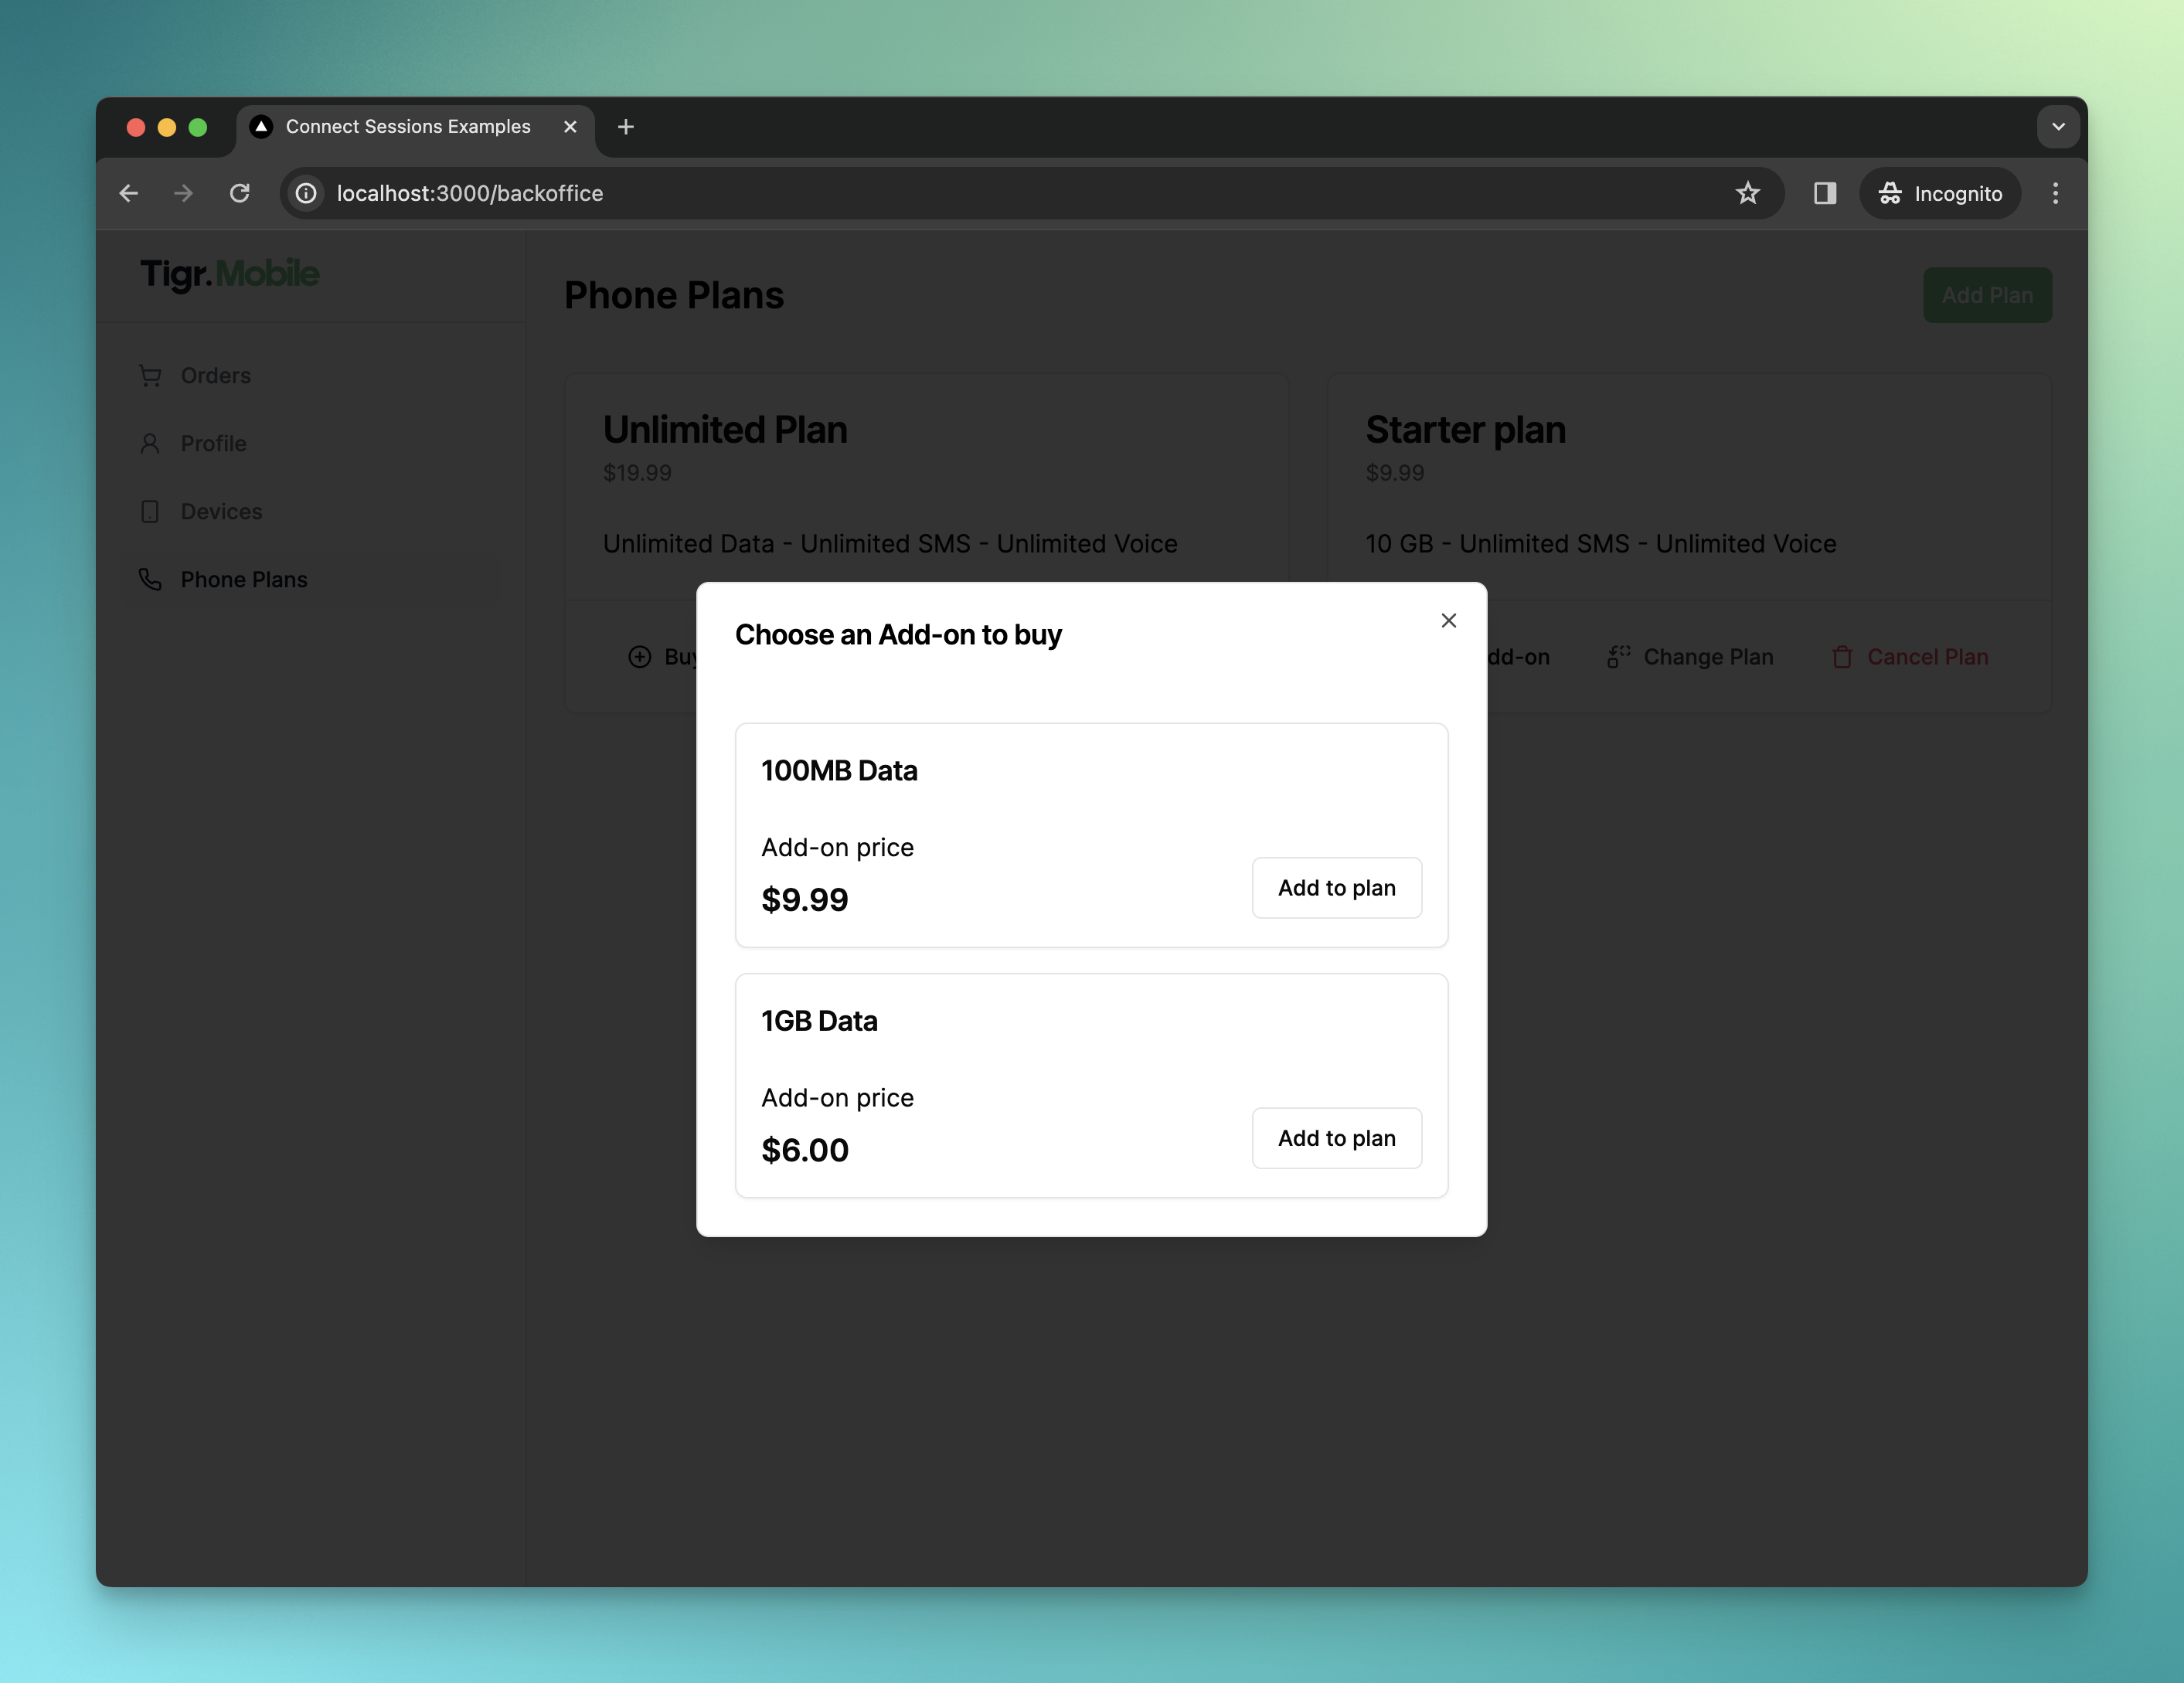
The `PurchaseAddonDialog` component lists all the available add-ons and allows users to select one they want to purchase:
```tsx
export const PurchaseAddonDialog = ({ addons, subscriptionId }) => {
return (
)
}
```
This completes the UI work. Next, we'll utilize Connect Sessions to implement the functionality of the buttons.
### Creating the Connect Sessions
We have three different Connect Sessions to write:
1. Cancelling a subscription
2. Changing a subscription
3. Purchasing an add-on
We’ll start with changing and cancelling a subscription, as the logic for both is very similar.
To change a subscription, we need to create a Connect Session with the `changeSubscription` intent, passing on the subscription ID and the user ID (which we will fetch the same way we did before, using our `auth` function):
```tsx
export const changeSubscription = async (subscriptionId: string) => {
// ... get user data
const connectSession: ConnectSessionParams = {
callbackUrl: 'http://localhost:3000/phone-plans',
intent: {
type: 'changeSubscription',
changeSubscription: {
subscription: subscriptionId,
},
},
user: existingUser.id,
}
return await createConnectSession(connectSession)
}
```
Just like with purchasing, we’ll wrap this in a function (this time called `changeSubscription`) and issue a request to `/connectSessions` (please refer to [the dedicated section of this guide][create-connect-session] above or see the [full implementation](https://github.com/gigs/connect-sessions-buy-manage-example/blob/main/lib/actions.ts#L63-L113) for reference).
Cancelling subscriptions is done in a similar way, but with the `cancelSubscription` intent:
```tsx
export const cancelSubscription = async (subscriptionId: string) => {
// ... get user data
const connectSession: ConnectSessionParams = {
callbackUrl: 'http://localhost:3000/phone-plans',
intent: {
type: 'cancelSubscription',
cancelSubscription: {
subscription: subscriptionId,
},
},
user: existingUser.id,
}
return await createConnectSession(connectSession)
}
```
Again, please see the [full implementation](https://github.com/gigs/connect-sessions-buy-manage-example/blob/main/lib/actions.ts#L39-L61) if you need more context.
We will wrap this Connect Session in a function called `cancelSubscription`.
With both of these functions in place, we can go ahead and connect the first two buttons in our `ManagePlanActions` component:
```tsx
export const ManagePlanActions = ({ subscriptionId, addons }) => {
const router = useRouter()
const handleCancelClick = async () => {
const { data: session, error } = await cancelSubscription(subscriptionId)
if (error) {
// Do error handling here
}
if (session?.url) {
router.push(session.url)
}
}
const handleChangeClick = async () => {
const { data: session, error } = await changeSubscription(subscriptionId)
if (error) {
// Do error handling here
}
if (session?.url) {
router.push(session.url)
}
}
return (
<>
)
}
```
When users press the "Change Plan" or "Cancel Plan" buttons now, they will be instantly redirected to Connect, where they can execute their desired action without having to log in or manually select the relevant plan.
For the add-ons, we need to supply a list of add-ons we want to purchase (just one in our case) and the subscription ID to the Connect Session.
```tsx
const connectSession = {
callbackUrl: 'http://localhost:3000/phone-plans',
intent: {
type: 'checkoutAddon',
checkoutAddon: {
addons: [addonId],
subscription: subscriptionId,
},
},
user: existingUser.id,
}
```
We will wrap this Connect Session in a function called `checkoutAddon` :
```tsx
export const checkoutAddon = async (
addonId: string,
subscriptionId: string,
) => {
// Get the current users' user ID from the Gigs API and construct the user payload
// as seen in previous examples
const userPayload = createUserPayload()
const connectSession = {
callbackUrl: 'http://localhost:3000/phone-plans',
intent: {
type: 'checkoutAddon',
checkoutAddon: {
addons: [addonId],
subscription: subscriptionId,
},
},
user: existingUser.id,
}
const options: RequestInit = {
method: 'POST',
headers,
body: JSON.stringify(connectSession),
}
const response = await fetch(
`https://api.gigs.com/projects/${process.env.GIGS_PROJECT}/connectSessions`,
options,
)
const data = await response.json()
if (response.status !== 200) {
console.error(data)
return {
error: data.message,
}
}
return { data }
}
```
With this function in place, we can connect the “Buy” Buttons in the `PurchaseAddonDialog` :
```tsx
export const PurchaseAddonDialog = ({ addons, subscriptionId }) => {
const router = useRouter()
if (addons.length === 0) {
return null
}
const handleBuyAddonClick = async (addonId: string) => {
const { data: session, error } = await checkoutAddon(
addonId,
subscriptionId,
)
if (error) {
// Do error handling here
}
if (session?.url) {
router.push(session.url)
}
}
return (
)
}
```
## Handling callback redirects
Upon a successful or failed Connect Session operation, the user will be redirected back to the `callbackUrl` we defined when we created our Connect Session, in our case, the `/phone-plans` page.
The callback url will be receiving a `session_id` and a `status` parameter that we can use to identify the Connect Session, as well as the outcome of the operation.
The first step is to define a function that fetches the Connect Session that triggered the callback:
```tsx
export const getConnectSession = async (connectSessionId: string) => {
const response = await fetch(
`https://api.gigs.com/projects/${process.env.GIGS_PROJECT}/connectSessions/${connectSessionId}`,
{ headers },
)
const data = await response.json()
if (response.status !== 200) {
return {
error: data.message,
}
}
return { data }
}
```
Next, we call this function in our callback page in order to obtain the Connect Session in question. We also evaluate the outcome by checking the `status` value:
```tsx
const successMessageMap = {
checkoutAddon: 'Addon successfully added to subscription!',
changeSubscription: 'Subscription successfully changed!',
cancelSubscription: 'Subscription successfully cancelled!',
checkoutNewSubscription: 'Subscription successfully added!',
undefined: 'Operation successfully completed'
}
const PhonePlansPage = async ({ searchParams }: { searchParams?: { session_id?: string; status: 'success' | string }}) => {
const isCallback = !!searchParams?.session_id
const { data: connectSession } = isCallback
? await getConnectSession(searchParams.session_id!)
: { data: null }
const alertVariant = isCallback && (searchParams.status === 'success' ? 'success' : 'error')
const alertMessage = isCallback && (searchParams.status === 'success'
? successMessageMap[connectSession?.intent.type]
: `An error occurred: ${searchParams.status}`)
return (
<>
{isCallback && }
{/* rest of the phone plans page */}
}
export default PhonePlansPage
```
And with that, we have completed the callback handling. Users will now be redirected back to our application after completing their
Connect Session, where they will be informed of the outcome of their operation.
With these minimal API calls, users can now seamlessly manage their phone plans via our app, transitioning to Connect only when necessary.
# Resources
- Read the [Connect Sessions API Documentation][create-connect-session]
- Look through the [full source code of the example application](https://github.com/gigs/connect-sessions-buy-manage-example/tree/main)
- Reach out to [support@gigs.com](mailto:support@gigs.com) for assistance
[gigs-support]: mailto:support@gigs.com
[create-connect-session]: /connect/connect-sessions#create-a-connect-session
[list-all-subscription-add-ons]: /core/subscription-add-ons#list-all-subscription-add-ons
[search-for-users]: /core/users#search-for-users